Adding an Alias
An email alias is an alternative email address that forwards to a primary mailbox account. It acts like a mask or nickname for your main email address. For example you can have the email addresses info@example.com and lucy.adams@example.com point to lucy@example.com.
How to add an Alias:
- Login to the Ness Web Solutions Client Portal
- Navigate to your email product
- Click on Manage Aliases
- Click on the green Add Alias on the right side of the screen
- In the Alias field, type in the alias email address you want. For example if you want an alias email of info@testdomain1.com to go to test@testddomain1.com, type in "info"
- In the Forward field, select the mailbox the alias is for, from the dropdown list (click on the field to select what mailbox)
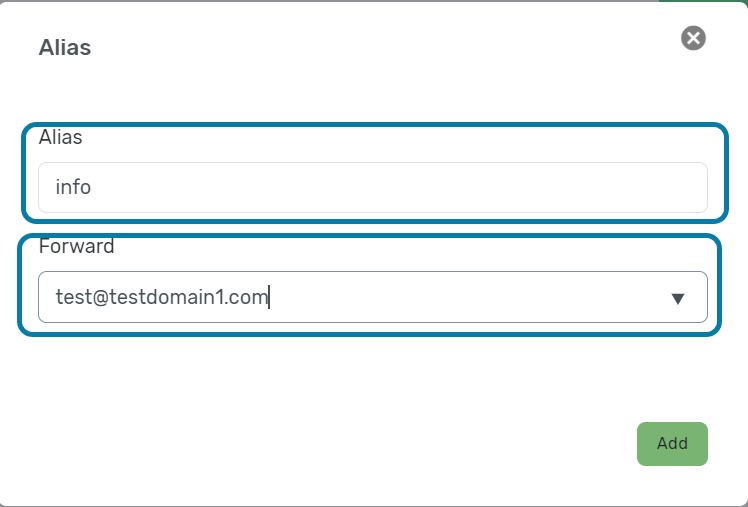
- Click Add
How to edit an Alias
You can change what mailbox the alias email address belongs to. If you want a different Alias, you have to create a new alias.
- Login to the Ness Web Solutions Client Portal
- Navigate to your email product
- Click on Manage Aliases
- Click on the green Edit button, for the alias you want to edit
- Select from the dropdown what mailbox you want the alias for
- Click Update
How to delete an Alias
- Login to the Ness Web Solutions Client Portal
- Navigate to your email product
- Click on Manage Aliases
- Click on the red Delete button, for the alias you want deleted