In order to use your domain you have to set up name servers. Name servers are provided by your website hosting company and may look like:
- ns1.yourwebsitehosting.com
- ns2.yourwebsitehosting.com
- ns39.yourwebsitehosting.com
- ns40.yourwebsitehosting.com
Having the name servers set properly for your website hosting provider is very important. If not set properly, your website will not load.
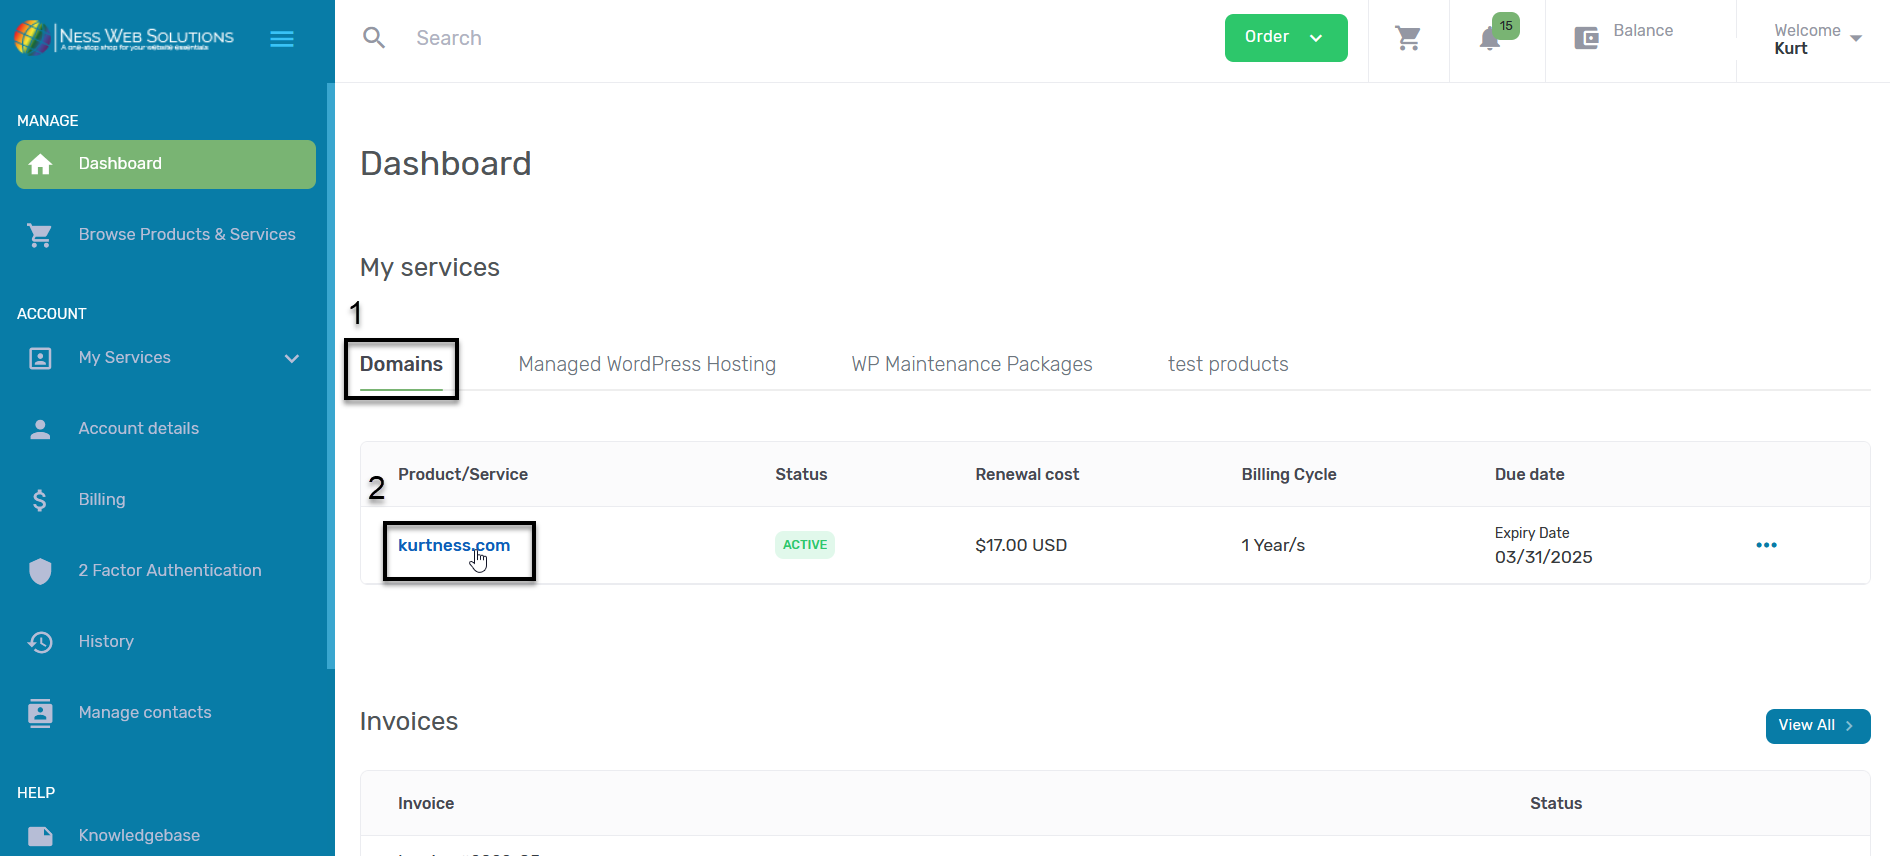
To set your name servers for domains registered with Ness Web Solutions:
- Log into your Client Portal
- Click on Dashboard located in the menu
- Click on the Domains tab, then Click on the domain name you wish to manage.
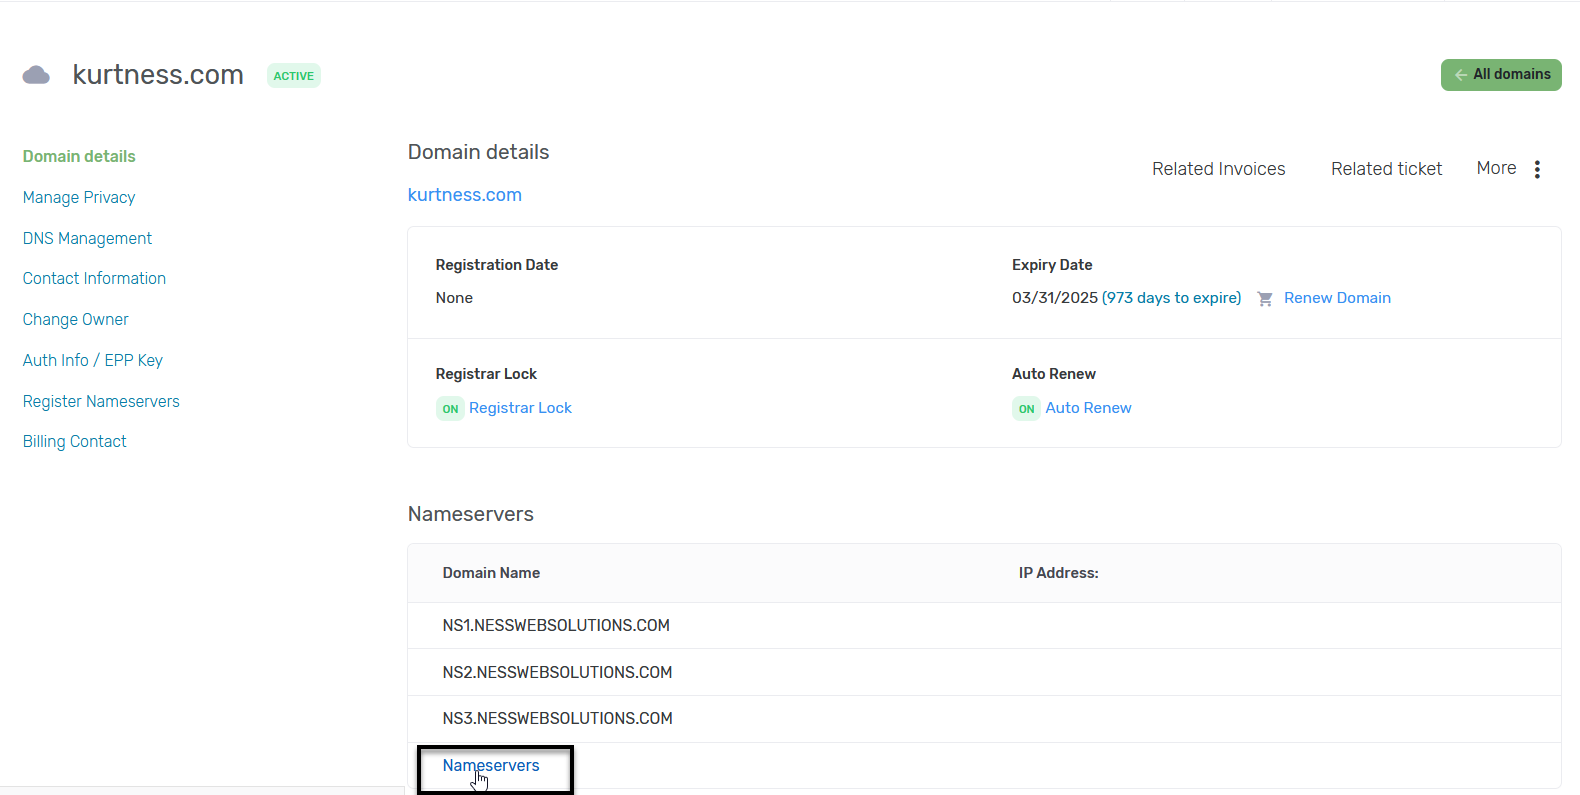
- On the "Domain Details" tab you will see the name servers your domain is currently set to. Click on Nameservers, below the name servers
- You can select to use our nameservers, or you can use your custom nameservers. If you want to use custom nameservers, select the Custom button.
- If you want to use custom nameservers, select the button next to Custom.
Then enter your custom nameservers. If you are provided with IP addresses for the nameservers, you can enter them in the field of IP Address, but they are not required. Make sure to enter all of the nameservers you are provided. - If you are using our website hosting, click the button next to Our nameservers.
- Once you have entered all of your nameservers, click Save Changes.
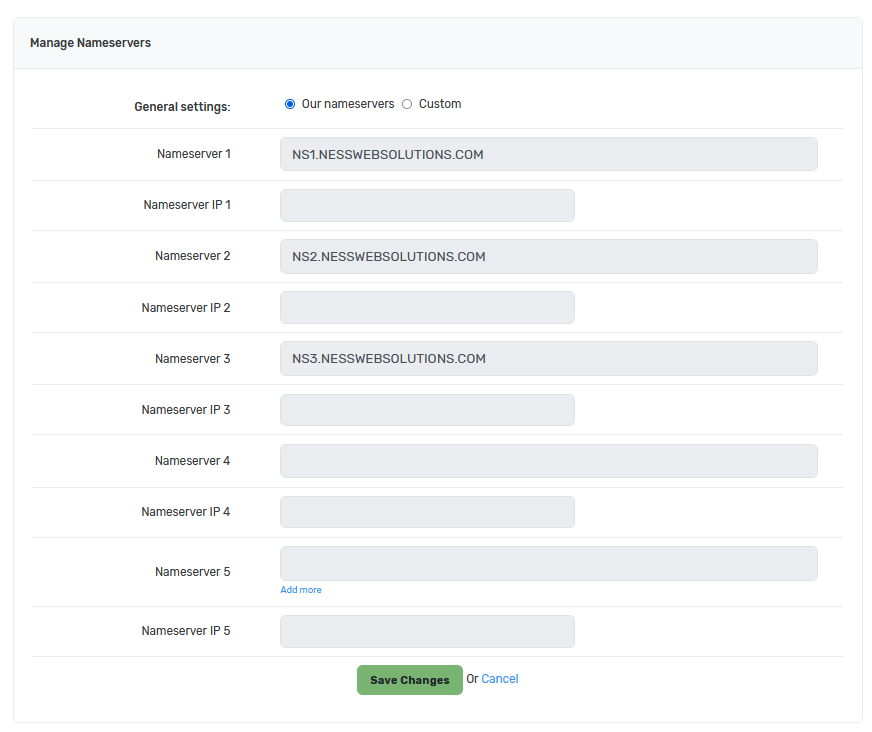
- If you want to use custom nameservers, select the button next to Custom.